Eric Gazoni – Wise Old Geek

Technical Advisor | Software Architect | Open Source Creator

Building useful things for 20 years. Still debugging life.

Category: Tools

  • Buildling a Kubernetes cluster in my basement

    For some recent customer work I had to deploy some Docker images on Kubernetes, but didn’t want to setup a full-fledged cluster (nor pay for one) as it was going to be a temporary environment anyway. I therefore dusted off an old PC I had laying around in my basement, and decided I would use it as the base of my cluster.

    What I needed

    • At least 3 VMs to install Kubernetes (1 master + 2 nodes)
    • One VM to host GitLab + GitLab Registry
    • One VM to run a GitLab Runner (for pipelines)

    Setting up the host

    After some back-and-forth discussions with my colleague Kenny van de Maele I went on using Centos 7 to host the VMs, mostly because I was already proficient with Centos and very happy with the platform.

    After booting Centos Minimal ISO, I was able to quickly set up the host machine, then I just had to enable my network card (which was not enabled by default) using nmcli d and nmtui as described in the following blog post: https://lintut.com/how-to-setup-network-after-rhelcentos-7-minimal-installation/

    Building the VMs

    Google was good to me by putting this link in the top results, which was exactly what I was looking for: https://www.cyberciti.biz/faq/how-to-install-kvm-on-centos-7-rhel-7-headless-server/

    Since I was going to repeat the process a few times, I just gathered all the bits from the blog post into a single script, and ran it multiple times after altering the $VM variable where the vm name is set. You could also remove it completely from the script itself, and run the script like this:

    $ VM=centos7-vm1 ./build_vm.sh

    D=/var/lib/libvirt/images
    VM=centos7-vm1 ## vm name ##
    mkdir -vp $D/$VM
    cd $D/$VM
    echo "instance-id: $VM" >> meta-data
    echo "local-hostname: $VM" >> meta-data
    cd $D/$VM
    cat >user-data << EOF
    #cloud-config
     
    # Hostname management
    preserve_hostname: False
    hostname: $VM
    fqdn: $VM.oasis.local
     
    # Users
    users:
        - default
        - name: eric
          groups: ['wheel']
          shell: /bin/bash
          sudo: ALL=(ALL) NOPASSWD:ALL
          ssh-authorized-keys:
            - <the authorized-keys fingerprint for my private key>
     
    # Configure where output will go
    output:
      all: ">> /var/log/cloud-init.log"
     
    # configure interaction with ssh server
    ssh_genkeytypes: ['ed25519', 'rsa']
     
    # Install my public ssh key to the first user-defined user configured
    # in cloud.cfg in the template (which is centos for CentOS cloud images)
    ssh_authorized_keys:
      - <the authorized-keys fingerprint for my private key>
     
    # set timezone for VM
    timezone: Europe/Brussels
     
    # Remove cloud-init 
    runcmd:
      - systemctl stop network && systemctl start network
      - yum -y remove cloud-init
    EOF
    cd $D/$VM
    cp /var/lib/libvirt/boot/CentOS-7-x86_64-GenericCloud.qcow2 $VM.qcow2
    cd $D/$VM
    export LIBGUESTFS_BACKEND=direct
    qemu-img create -f qcow2 -o preallocation=metadata $VM.new.image 20G
    virt-resize --quiet --expand /dev/sda1 $VM.qcow2 $VM.new.image
    cd $D/$VM
    mv $VM.new.image $VM.qcow2
    mkisofs -o $VM-cidata.iso -V cidata -J -r user-data meta-data
    virsh pool-create-as --name $VM --type dir --target $D/$VM
    cd $D/$VM
    virt-install --import --name $VM \
    --memory 1024 --vcpus 1 --cpu host \
    --disk $VM.qcow2,format=qcow2,bus=virtio \
    --disk $VM-cidata.iso,device=cdrom \
    --network bridge=virbr0,model=virtio \
    --os-type=linux \
    --os-variant=centos7.0 \
    --graphics spice \
    --noautoconsole
    cd $D/$VM
    virsh change-media $VM hda --eject --config
    rm meta-data user-data $VM-cidata.iso

    If you want to configure the VM memory and CPU count, you can do so by editing the command starting by virt-install [...] --memory 1024 --vcpus 1

    Configuring bridge networking

    After I was done with setting up the VMs, I realized KVM was hosting them on a separate network subnet than the rest of my LAN, which is perfectly fine, but was preventing me from connecting directly to the VMs. Since I’m using Ansible to configure my VMs, I need to be able to SSH directly into them, and I didn’t want to bother with using the host as a jump-host.

    It only required 2 configuration changes on the host and adding a permanent route in my router:

    Disabling the host firewall

    # service firewall disable

    I tried several fixes to have iptables not drop packets aimed at the VMs subnet, but unfortunately my experience editing rules was too rudimentary and I didn’t want to spend too much time securing a temporary platform hosted in my basement and only accessible from my LAN.

    Enabling IP forwarding

    This can be done by editing /etc/sysctl.conf and setting the parameter
    net.ip_forwading = 1

    Afterwards, a simple call to /sbin/sysctl -p will persist the parameter.

    Adding the route

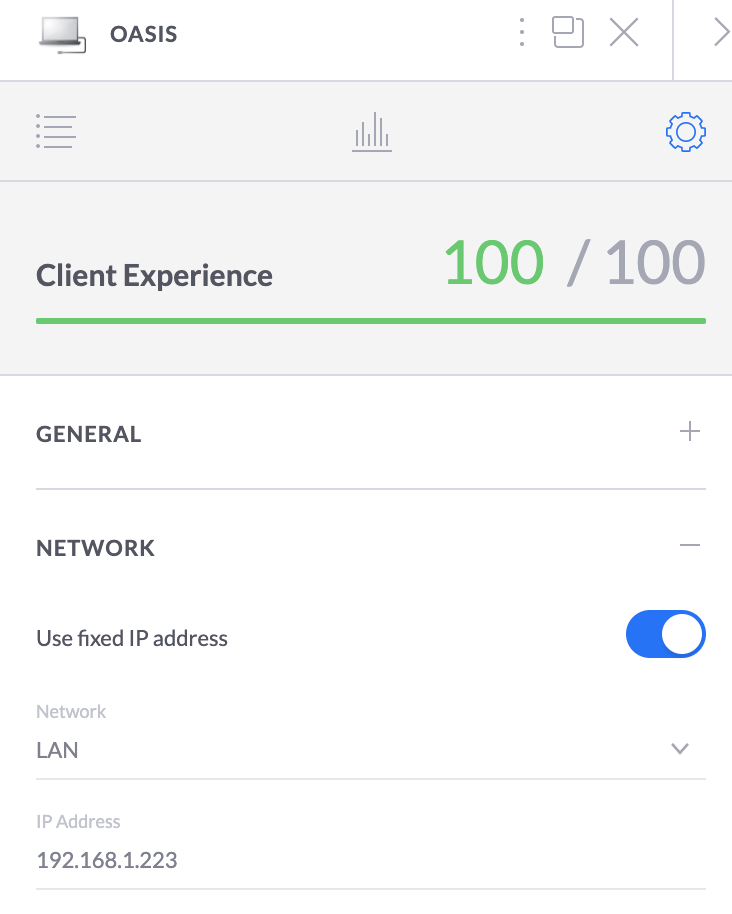
    My LAN subnet is 192.168.1.0, and the VMs subnet is 192.168.122.0, so I had to use the host (which has IP 192.168.1.223 on my network) as gateway to brige both networks. Be sure to give your host a fixed IP if you want to set up a permanent route on your LAN.

    “Oasis” is the name of the host, I was careful to assign it a fixed IP so I could add a permanent route
    Your mileage may vary depending on your network solution vendor, but for me it looked like this on my Ubiquiti controller when I was done

    I now realize this is already a lot to process, I will most likely make a second blog post on the actual Kubernetes install, stay tuned.

  • Converting an SQLite database to Access

    SQLite Logo, SVG version
    Image via Wikipedia

    After looking for two hours after a tool able to perform such a conversion for a reasonable price, I found a free solution to my customer request:

    • You need Windows, but it works fine in a virtual machine (such as Virtualbox) if you’re on a Mac or Linux/BSD
    • You will also need MS Access installed on this Windows box (I’ll be using Access 2007, so the menu labels might not look exactly as I say, but they are here)
    • You will need to install the SQLite ODBC driver by Christian Werner
    • Then, do not try to use the driver directly from Access (almost gave up the whole thing doing this way) but instead go to your Control Panel > ODBC Sources
    • Create a new source (DSN) from here, pointing to your SQLite file (tested with a SQLite3 database, using the SQLite3 ODBC driver)
    • Start Access, create a new database (tip: if you want to keep Access 2003 compatibility under Access 2007, replace the .accdb extension by .mdb in the “new filename” box
    • Go to External Data > ODBC Sources > System sources and select the DSN you just created at previous step
    • You’ll be prompted to select which tables to import, then start import
    • You’re done
    It did not preserve Foreign Keys at my first trial, I saw an option somewhere during the DSN configuration, but didn’t try it. As the driver is working perfectly, this option might as well.
    If it spits a reserved error” or says the database is encrypted or is not a valid database, then you didn’t follow the sequence and are probably trying to add the DSN from the Access ODBC dialog. Remember, it has to be done system wide or it won’t work.
  • The right tool for the job

    There are some tools that really make  your life easier when working.
    Some people might say that the only tool you’ll ever need is Emacs, but when working on Windows, there are some small utilities that can increase your productivity. Here is my personal choice.

    Launchy


    Launchy is a keystroke launcher. It can index your start menu, your bookmarks, your hard-drive and much more, and then let  you access your applications only by typing the first letters.

    It can also be used as a basic calculator, and directory browser.

    I use it constantly, and my start menu has since become a dumpster, because I never go there anymore.

    Note: for those who are under Windows 7, it works like the über-search from your start menu.

    Launchy is an open source product, you can get it here.

    Synergy

    I have a nice desktop computer with a very nice 22″ screen. I spend most of my (personal) coding time on this computer, but sometimes I wish I had another screen to keep my IDE in full screen while browsing documentation. I can’t afford a new display (and if I added a new 22″ screen next to this one, I couldn’t see my girlfriend anymore because her desk is in front of mine), but I have a 15″ laptop that can fit between the 22″ and the wall.

    For some time I wanted to control the laptop with my old school Compaq keyboard and my 10€ Logitech mouse (don’t need fancy hardware to make good work), but wasn’t satisfied with the idea of a KVM that would need constantly switching inputs from both computers. Then I found Synergy. It’s a virtual KVM. It runs in the background, and can control as many additional computers you can fit on your desk (some guys even tried with 8 or 10, for geekness sake).

    The configuration is very easy (once you understood the documentation):

    Let’s say you have to computers, A and B, A on the left and B on the right. On A, you just tell the program that when your mouse cursor reaches the right edge of your screen, it switches to computer B.
    On computer B, you say that when the mouse goes to the left edge, it switches to computer A. And that’s it.

    You end up seamlessly using both computers as if the display was one, really nice. You can even make cut-and-paste from one computer to another, and even across different OSes because Synergy is multi platform. You can control with one keyboard and one mouse at the same time a Linux netbook, a MacOS X laptop and a Windows desktop.

    Synergy is an open source product, you can get it here.

    Console

    I’ve already talked about Console here. It’s a Windows command line emulator. It can run any command line application (such as the Windows prompt or Cygwin) inside multiple tabs. It also supports copy-paste, transparency, custom fonts, sizes, colors, …

    Excellent upgrade for your standard cmd.exe.

    Console is an open source product, you can get it here.

    Winsplit Revolution

    Winsplit allows you to organize your windows on your desktop quickly and easily. Windows natively allows you to tile/cascade open windows on the screen, but it will always size them equally.

    What if you want one window take 1/3 of the screen and another one 2/3 ? You have to drag the handles so the window is at the right dimension. Winsplit solves this issue by providing several presets that you can activate by pressing a keystroke (Ctrl+Alt by default) and then drag your window on the region of the screen you wish to place it. A blue overlay will appear, showing you available presets for this region, and you can scroll through presets using the mouse wheel.

    When you are happy with the size and position, just release the window and it will stay there. Very useful when copy-pasting documents side-by-side.

    Winsplit Revolution is a freeware product, you can get it here.

  • Parallel computing

    There’s something I felt very curious about for some time now : parallel programming. The name sounded great, conveyed the same feeling as in “horsepower”, the feeling that you can do impressive things with it.

    Unfortunately, occasions are pretty rare to use that kind of technology if you:

    1. are not in a “number crunching” industry
    2. have plenty of time to run your calculations
    3. don’t have some spare hardware

    Recently, on a project, we had to process huge (not insanely huge, dozens of GB…) quantity of data in a short time frame (around one working day). Previous process took around a week, and by tuning the file formats and the algorithms, we reduced the time to two or three days. But we needed more. So I remembered that parallel computing idea, and searched about it.

    First conclusion: parallel computing is for UNIX/LINUX. That was not to please my customer who only uses MS Windows. Then the miracle happened: Condor, a grid computing framework with native builds for UNIX and Windows. Ok, we had the software … but how do you use it ?

    Second conclusion: if your process is not sliceable into independent pieces that can run on their own, you won’t benefit much from parallelism. That sounds obvious, that was not, and I spent some time trying to twist all my process so it could fit the parallel paradigm.

    Third conclusion: even if you can’t split your whole process, maybe there are sections of it that can be. If that’s the case, then you can adapt your process so it integrates the parallel part, which means splitting the data and the process before the calculation, then merging the results once it’s done.

    Fourth conclusion: parallel computing is cool. One of Condor’s greatest strengths is that it can harvest cycles on idle machines (lunch break/night for example) and run it’s jobs at those times, and instantly leave the computer if the user returns, so it does not even notice his computer was scavenged moments. Of course, it can also be run on dedicated server clusters, providing more stable income of CPU power.

    Final conclusion: it really helps. By using parallelism, I was able to reduce my two days into six hours, I can still use my PC while it’s doing crazy number crunching (actually managing a remote quad core server doing it) that require 100% CPU for hours, and it became safer because every action is monitored, so when a job crashes for any reason, it is restarted somewhere else, but a track is kept in the logs so I know that job went wrong once, twice, … and I can take actions accordingly. The best part is that if the job ninth’ job on ten crashes, I only have to restart one job and no longer the full batch, saving me hours of frustration…